

Rainbow Stairs
FILE THIS UNDER: Things I always wanted to do and never thought I would do.
Call it quarantine, call it a delayed home build, or just call it boredom … but we painted RAINBOW stairs and I’m OBSESSED!!!

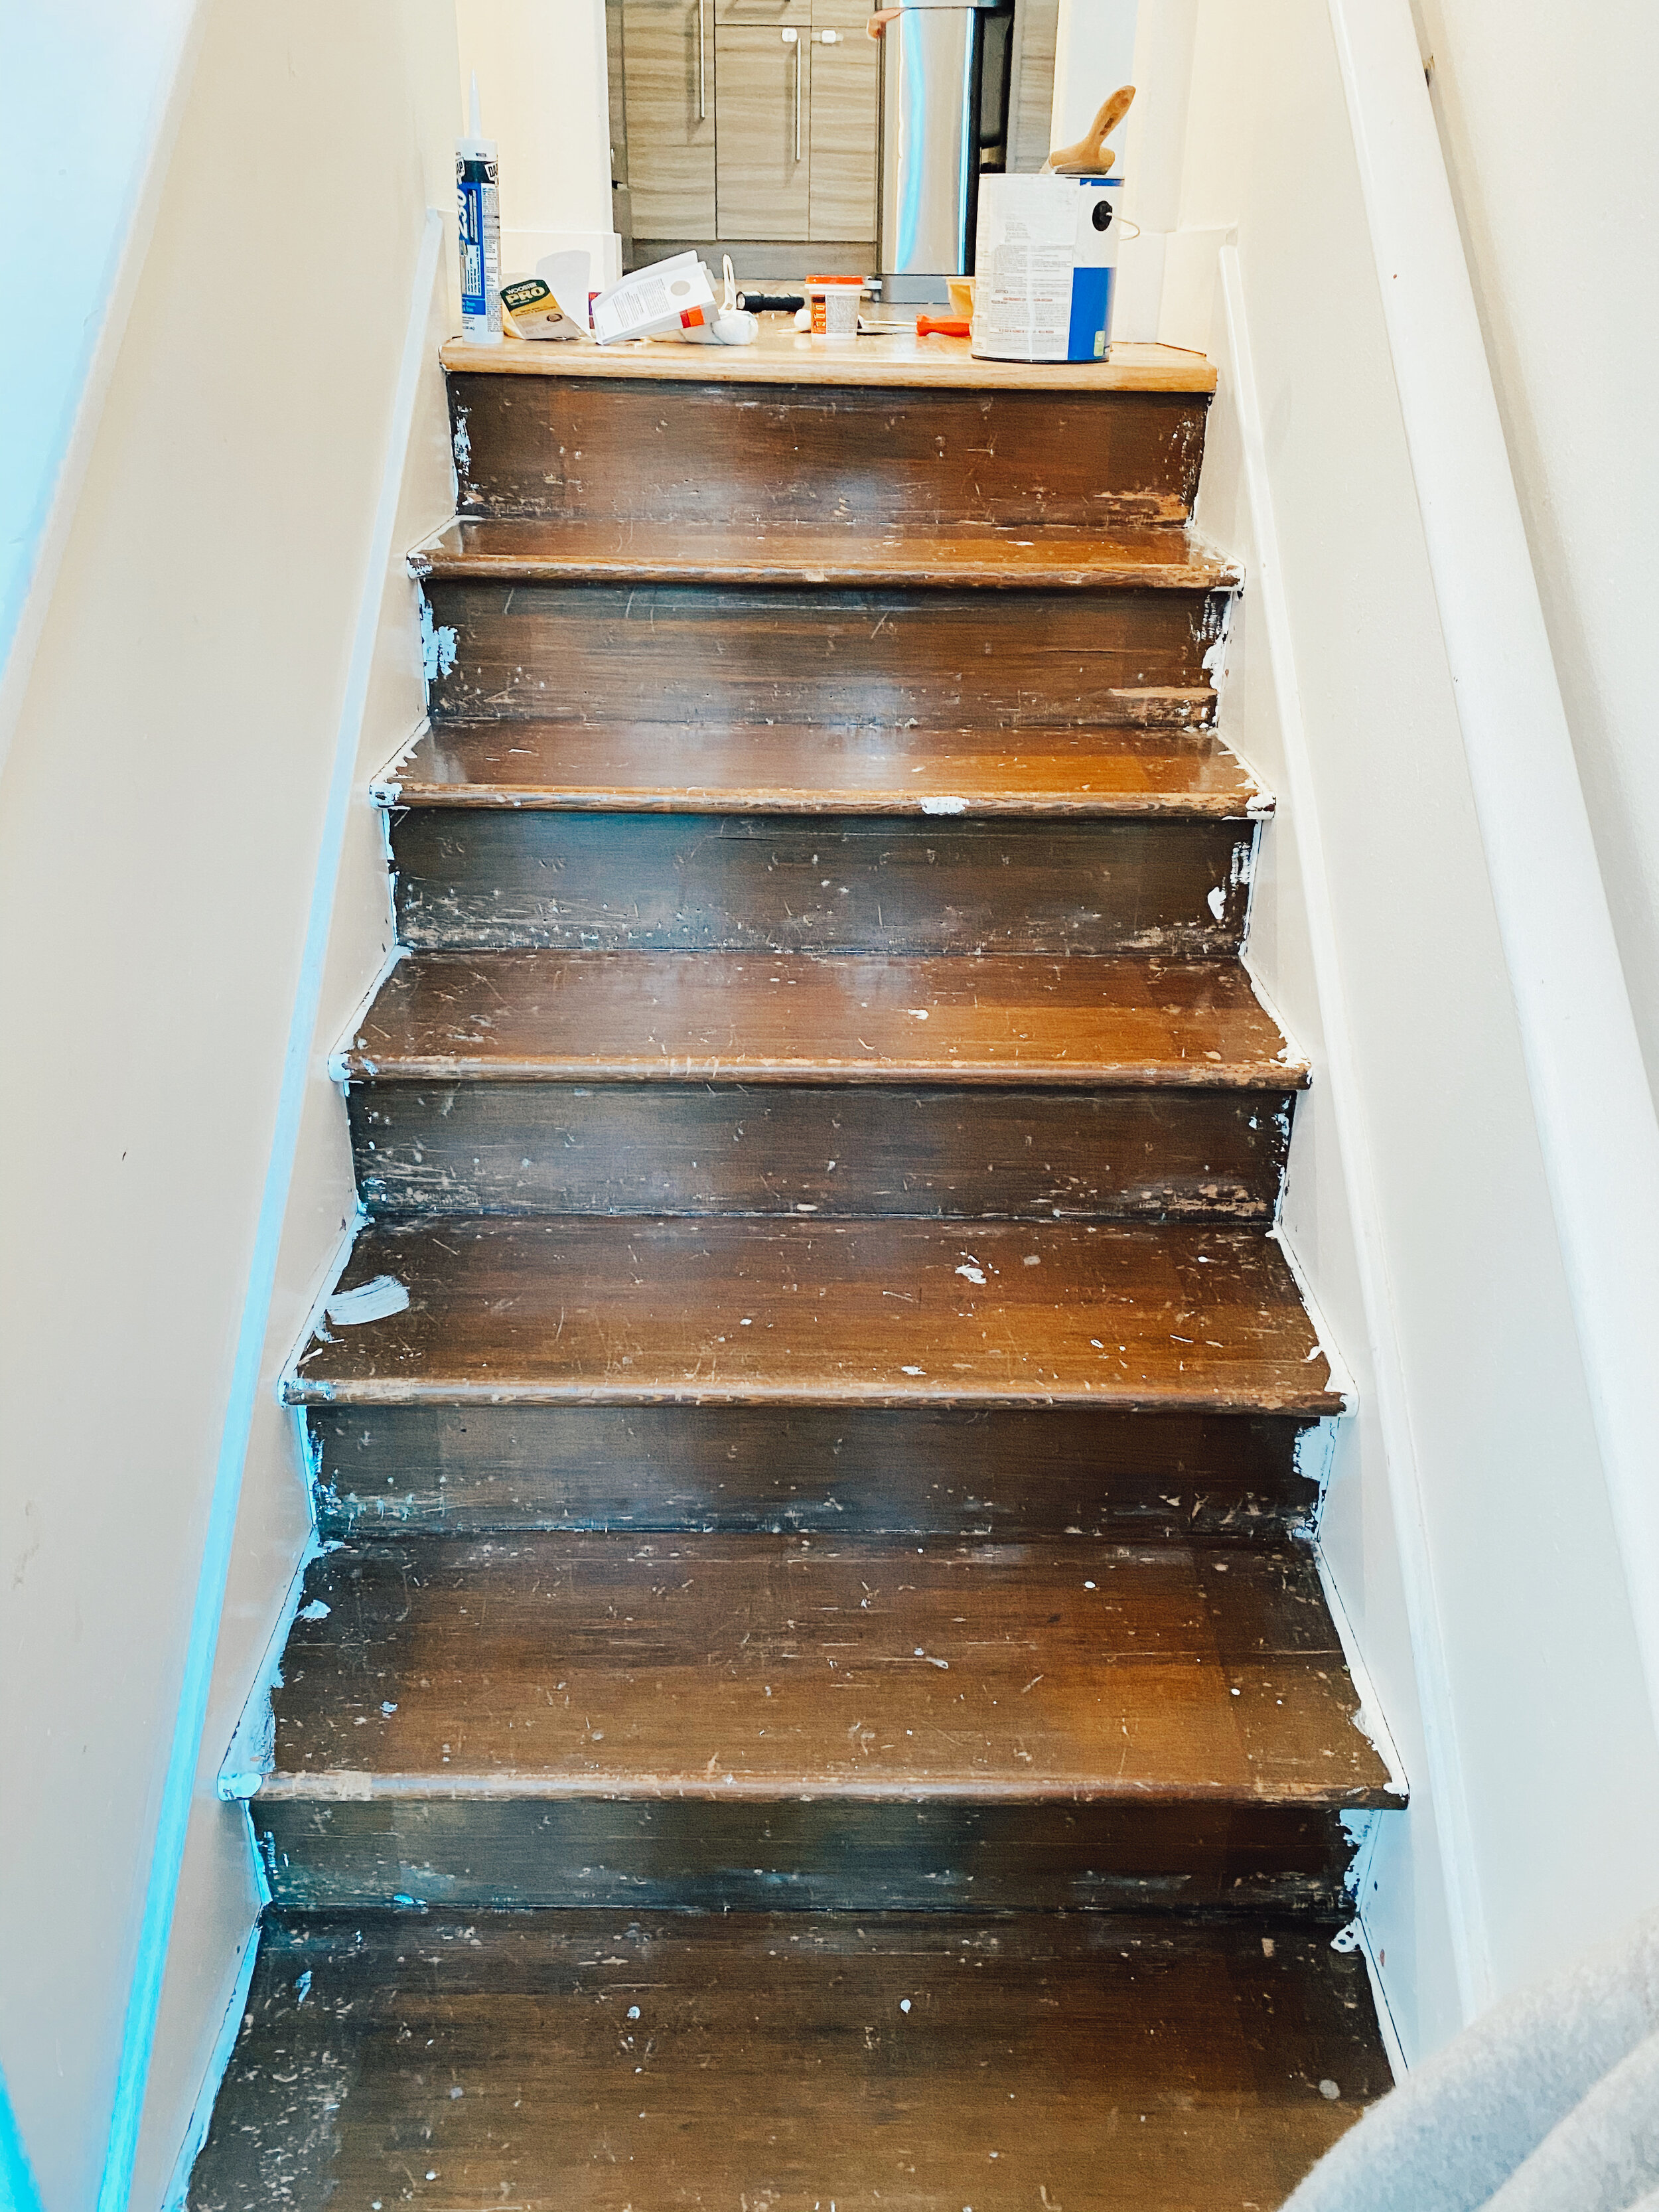
When we bought this house, it had super cheap carpet and worse than that, it covered the STAIRS. Gasp. Carpeted stairs is a hard-no from me — mostly because they get trashed SO fast. Especially because we’re in an old school split level where you literally have to use the stairs to go ANYWHERE in the house. they’re unfortunately the heart of the house.
SO, fast forward to all this quarantine madness and I feel like I was so frustrated all the time going up & down dirty stairs and constantly vacuuming up the mess. Exhausting. One night, probably somewhere around 8:00 PM (you know, when all brilliant ideas and DIYS begin), I decided to juuuust *see* what was underneath the horrible brown carpet.
Much to my delight, it was hardwood! Now, it wasn’t like an episode of HGTV where they peel back carpet and it was beautiful shiny floors. No, it was chocolate brown wood that was full of imperfections. BUT — it was better than the carpet!! I thought about it for a couple nights, scoured pinterest as one does, and decided that since this house will be bulldozed down in a matter of months, we might as well have some fun!
Collin and I have NEVER done a DIY together (again - NEVER) so this was a total first run and we actually enjoyed it! Having said that, I’m grateful we’re not trying our hand at building a house and have very few DIYS in our future.
The project was honestly so simple though.
We ripped out the existing carpet, pulled up the tack strips (collin used a square shovel to do this and it worked really well — thanks youtube!), and removed as many staples and nails as we could.
We sanded down any super rough areas, pulled out any random carpet threads, and just made sure everything was ready for primer and paint.
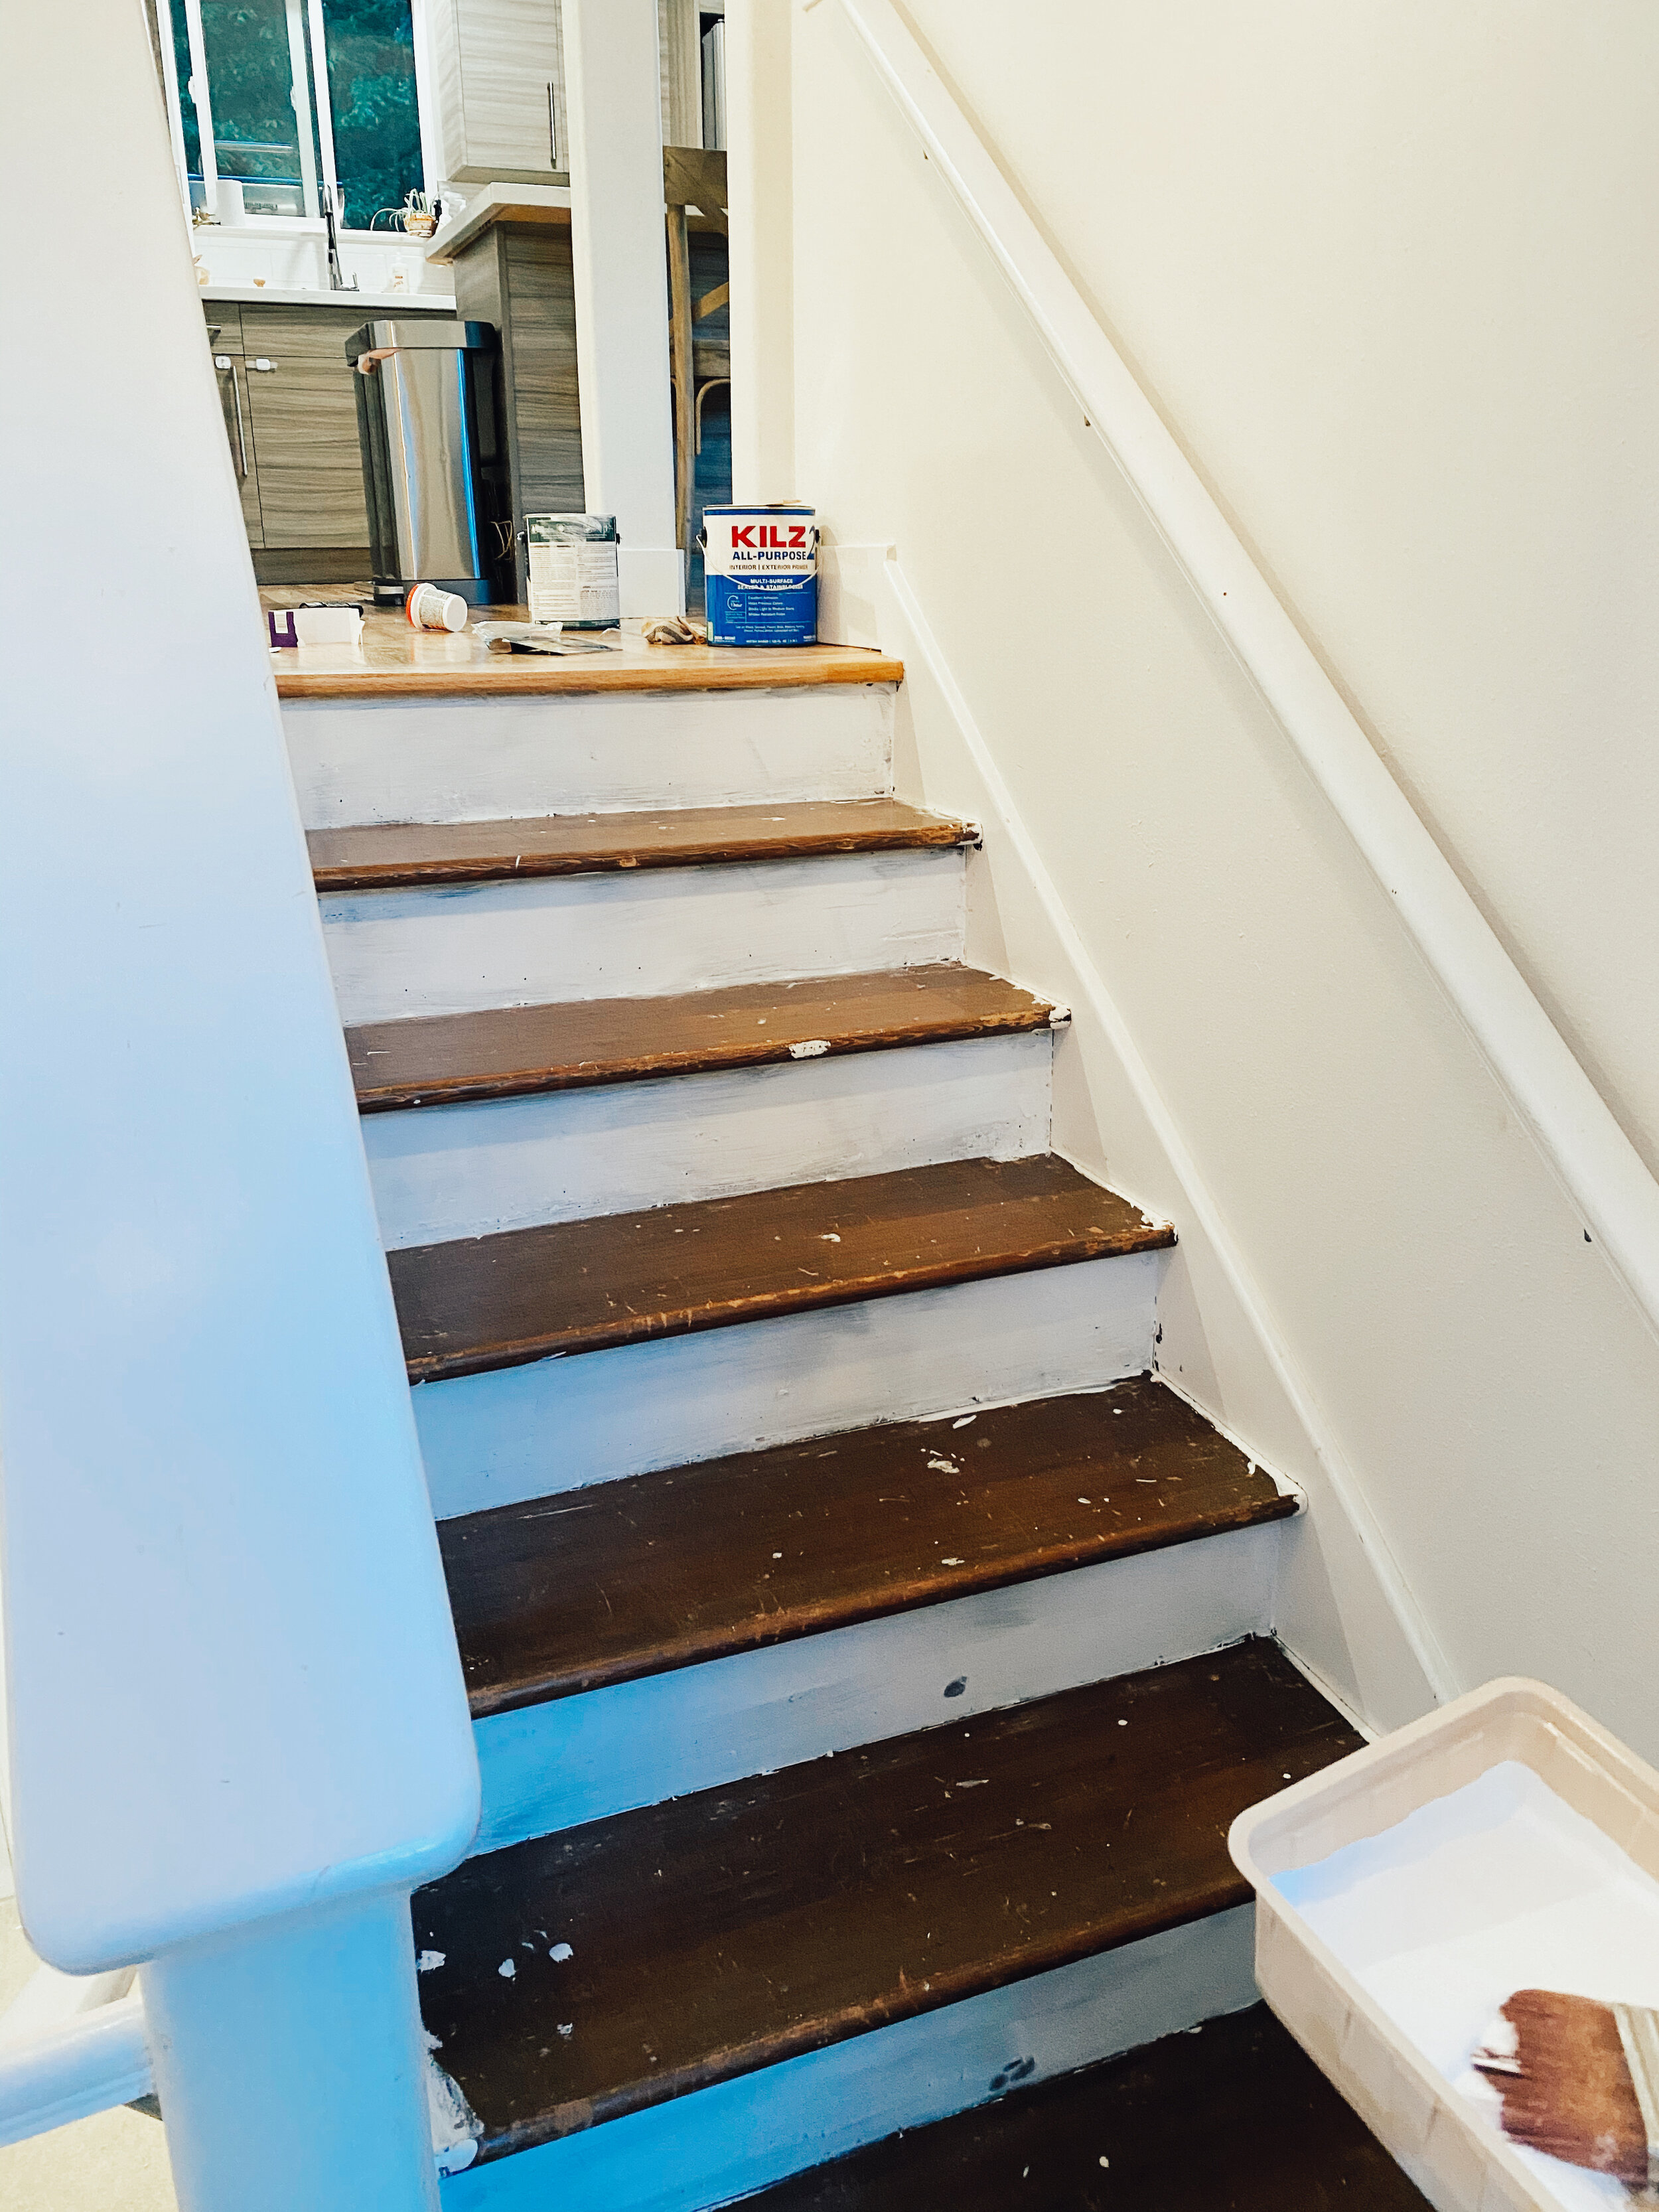
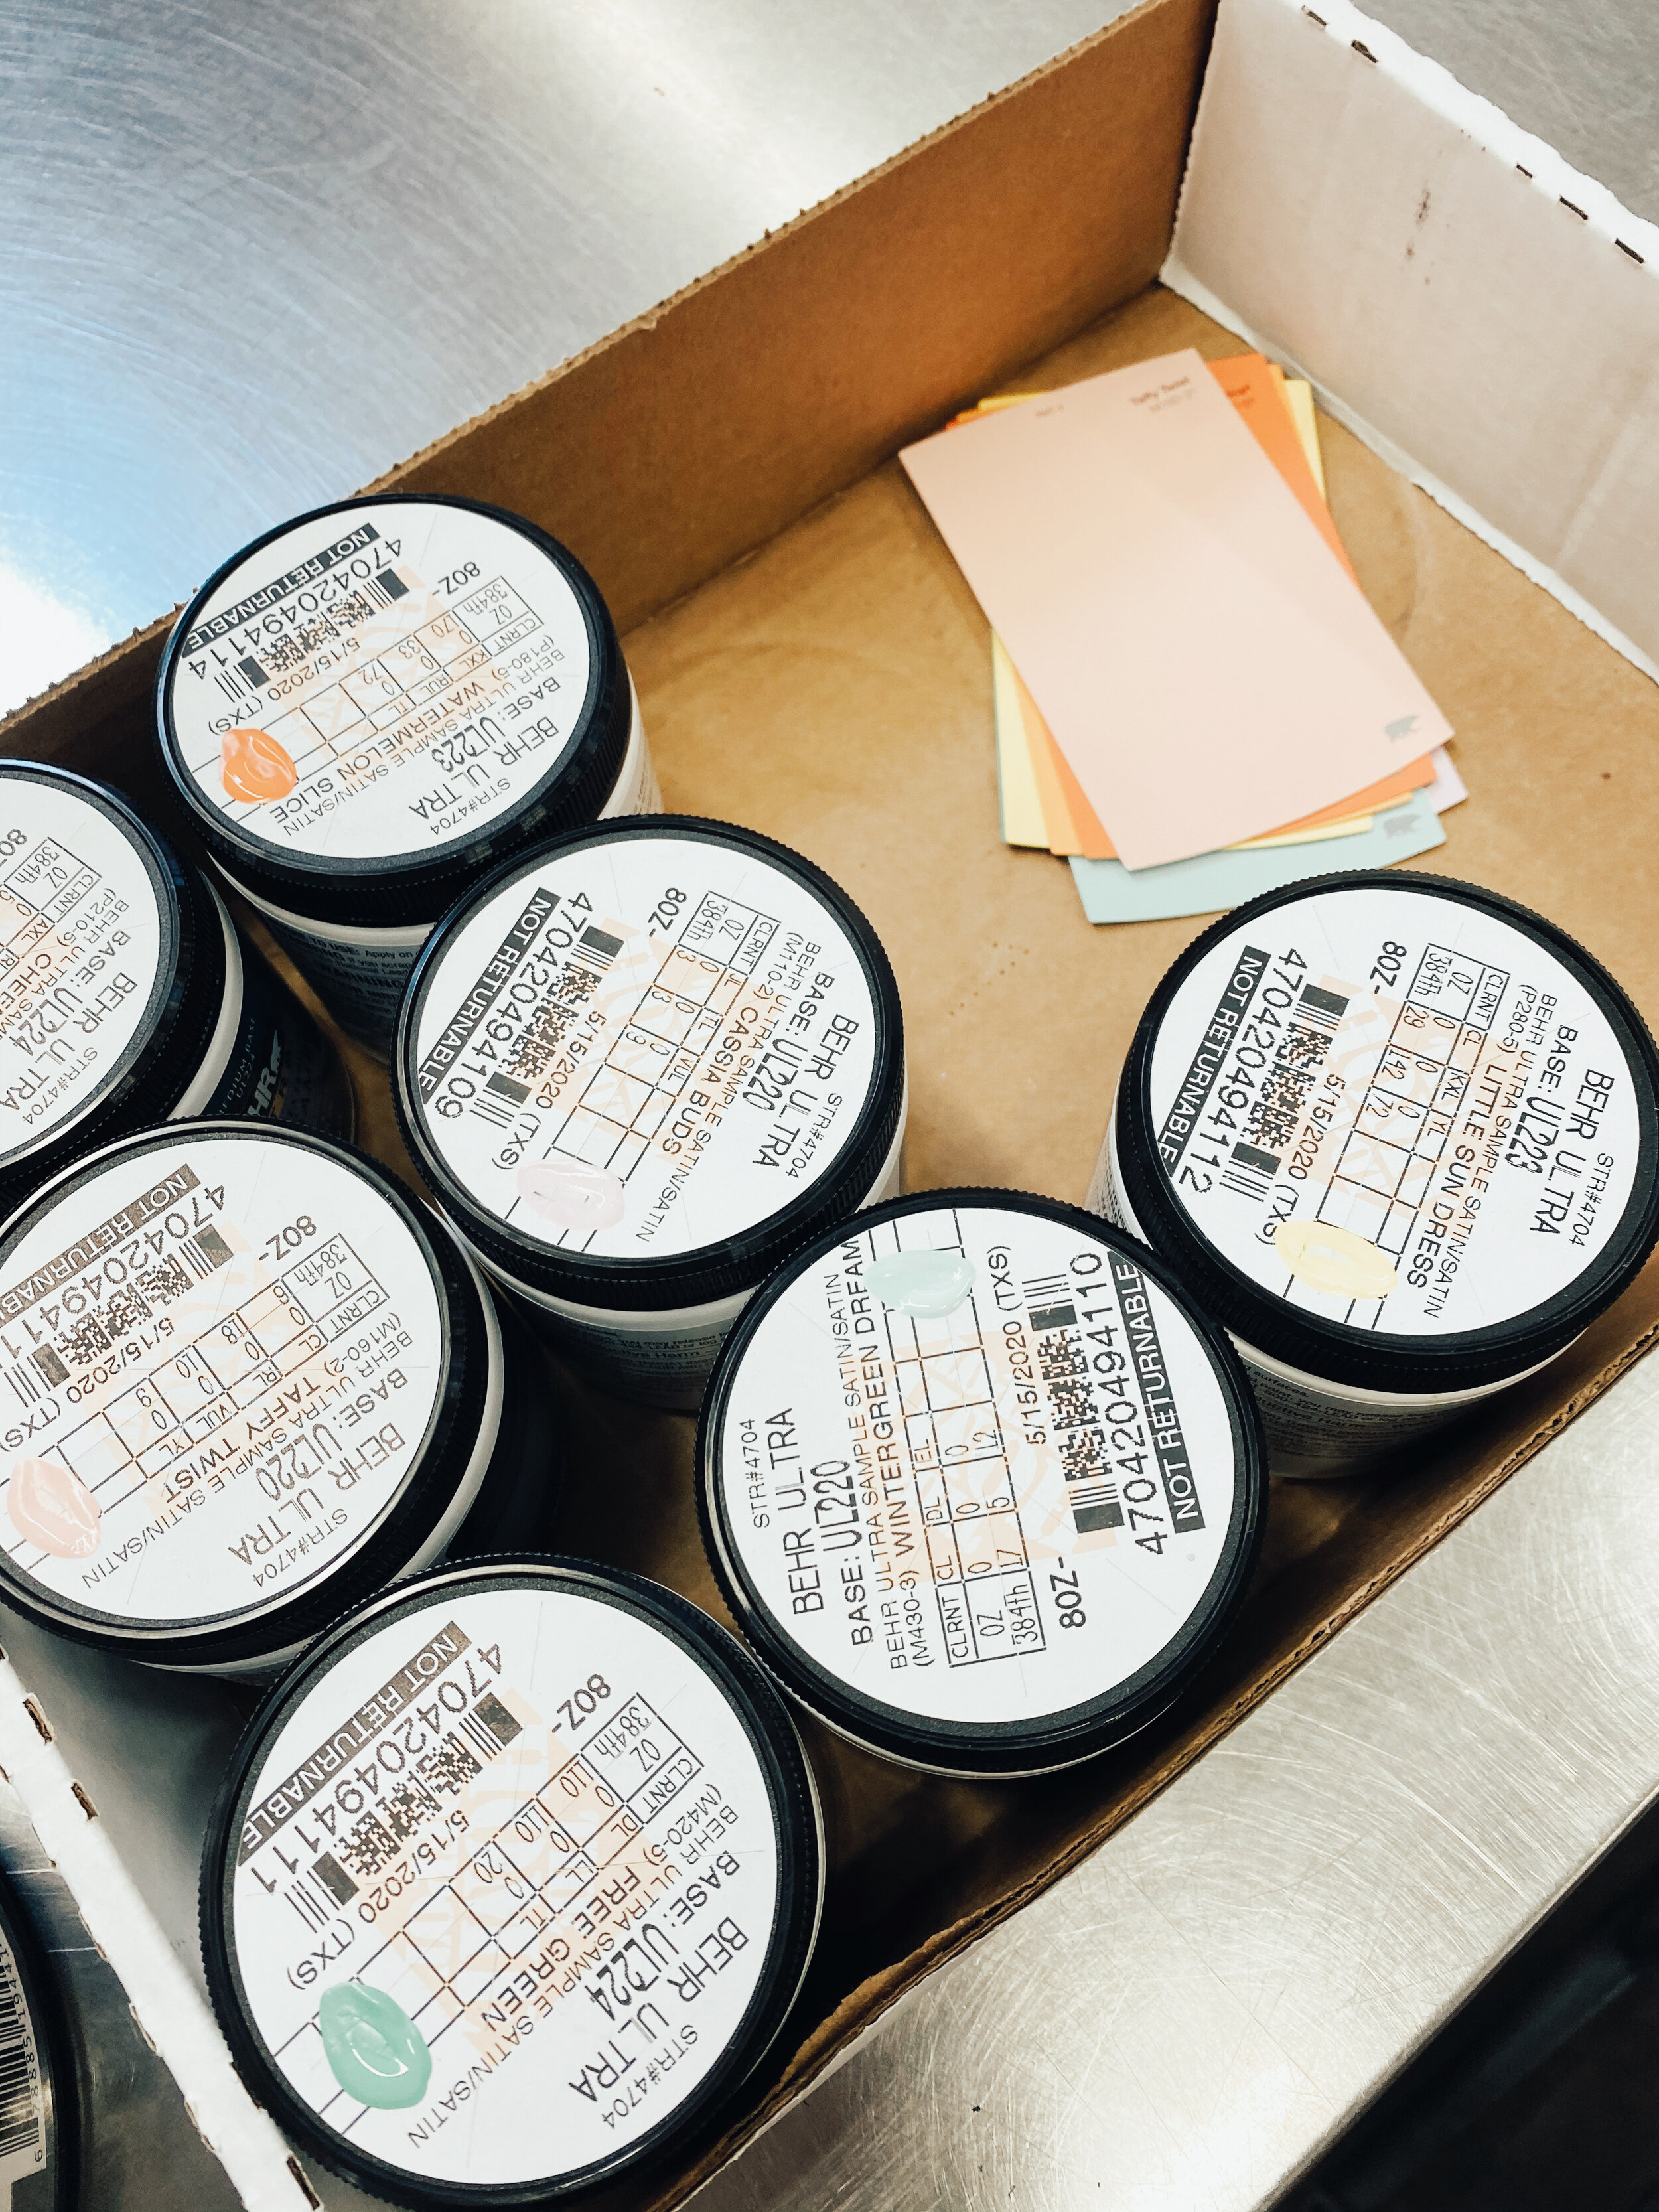
We first started by priming the front of each stair. We used a deck and floor paint for the tops of the stairs so I didn’t prime those because it was a 2in1. We used KILZ2 to prime.
After the fronts were primed and dry, we did one coat of white paint on the tops of the stairs. We used the BEHR Porch and Patio Floor paint, simply for the fact that it was super durable.
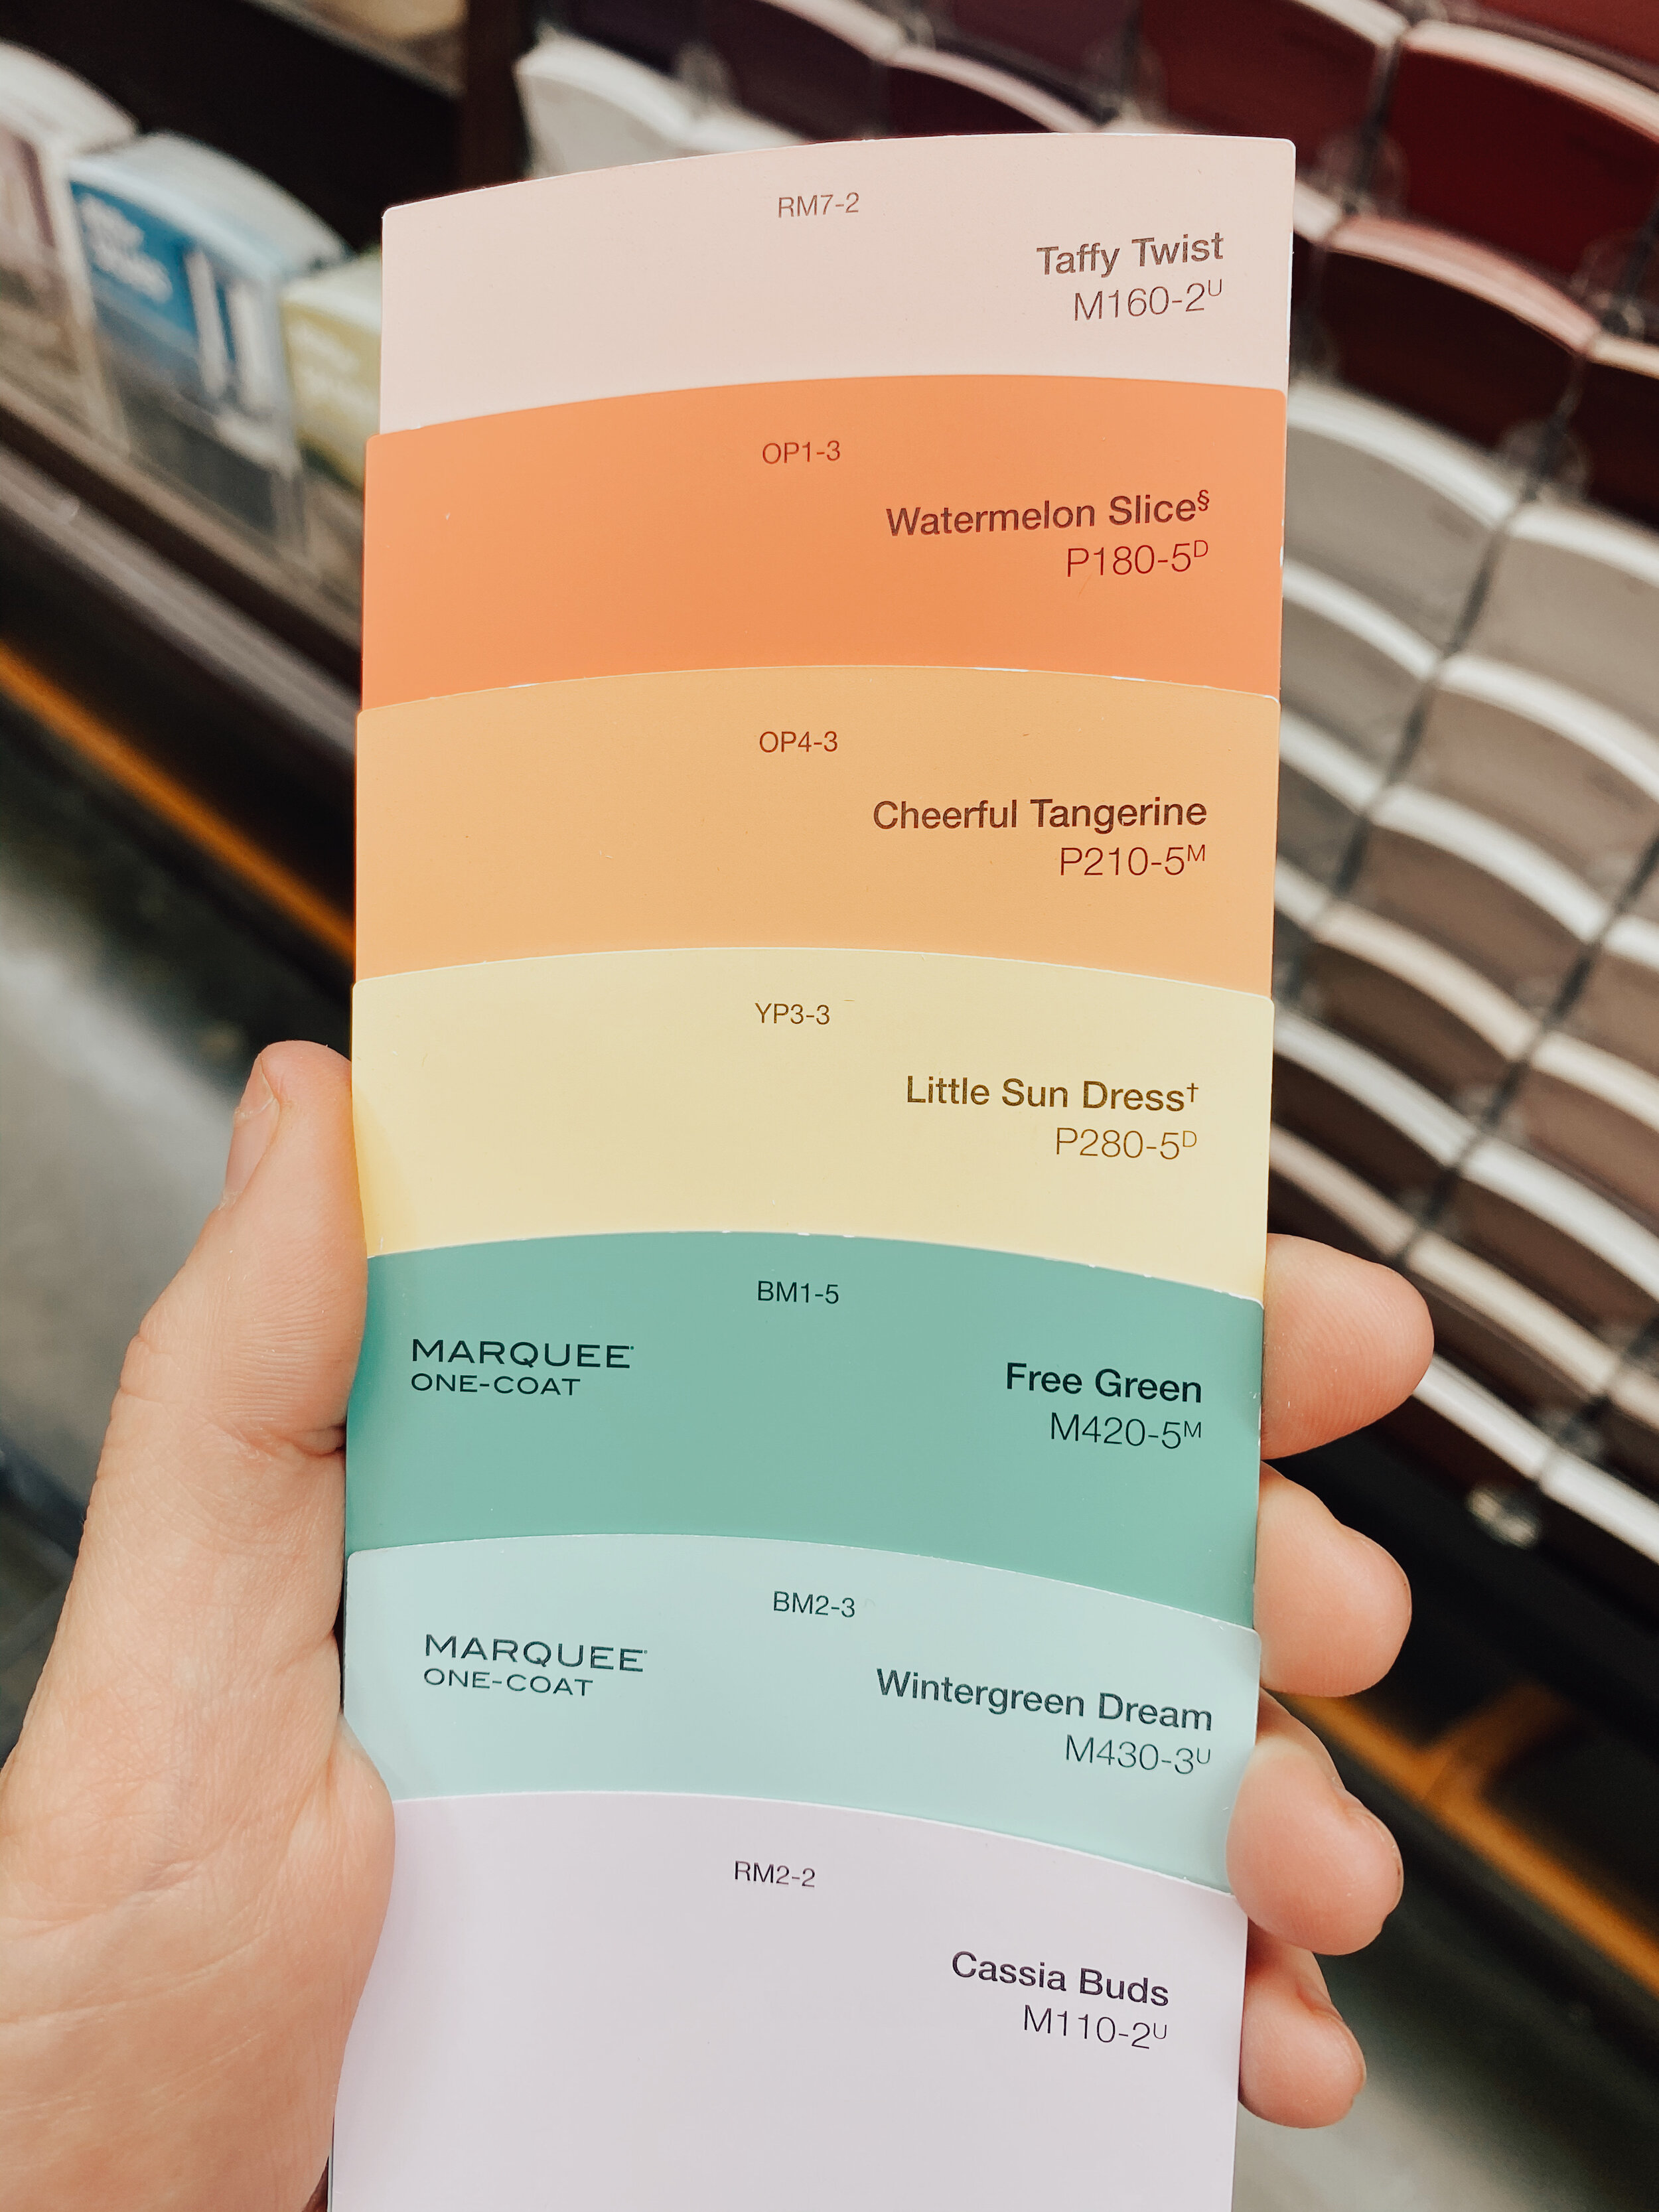
Once that was dry, we did the color on fronts of all the stairs. This part went pretty quick - 2 coats of color on each stair. All paint colors were Behr (shown below) and we did the Satin finish.
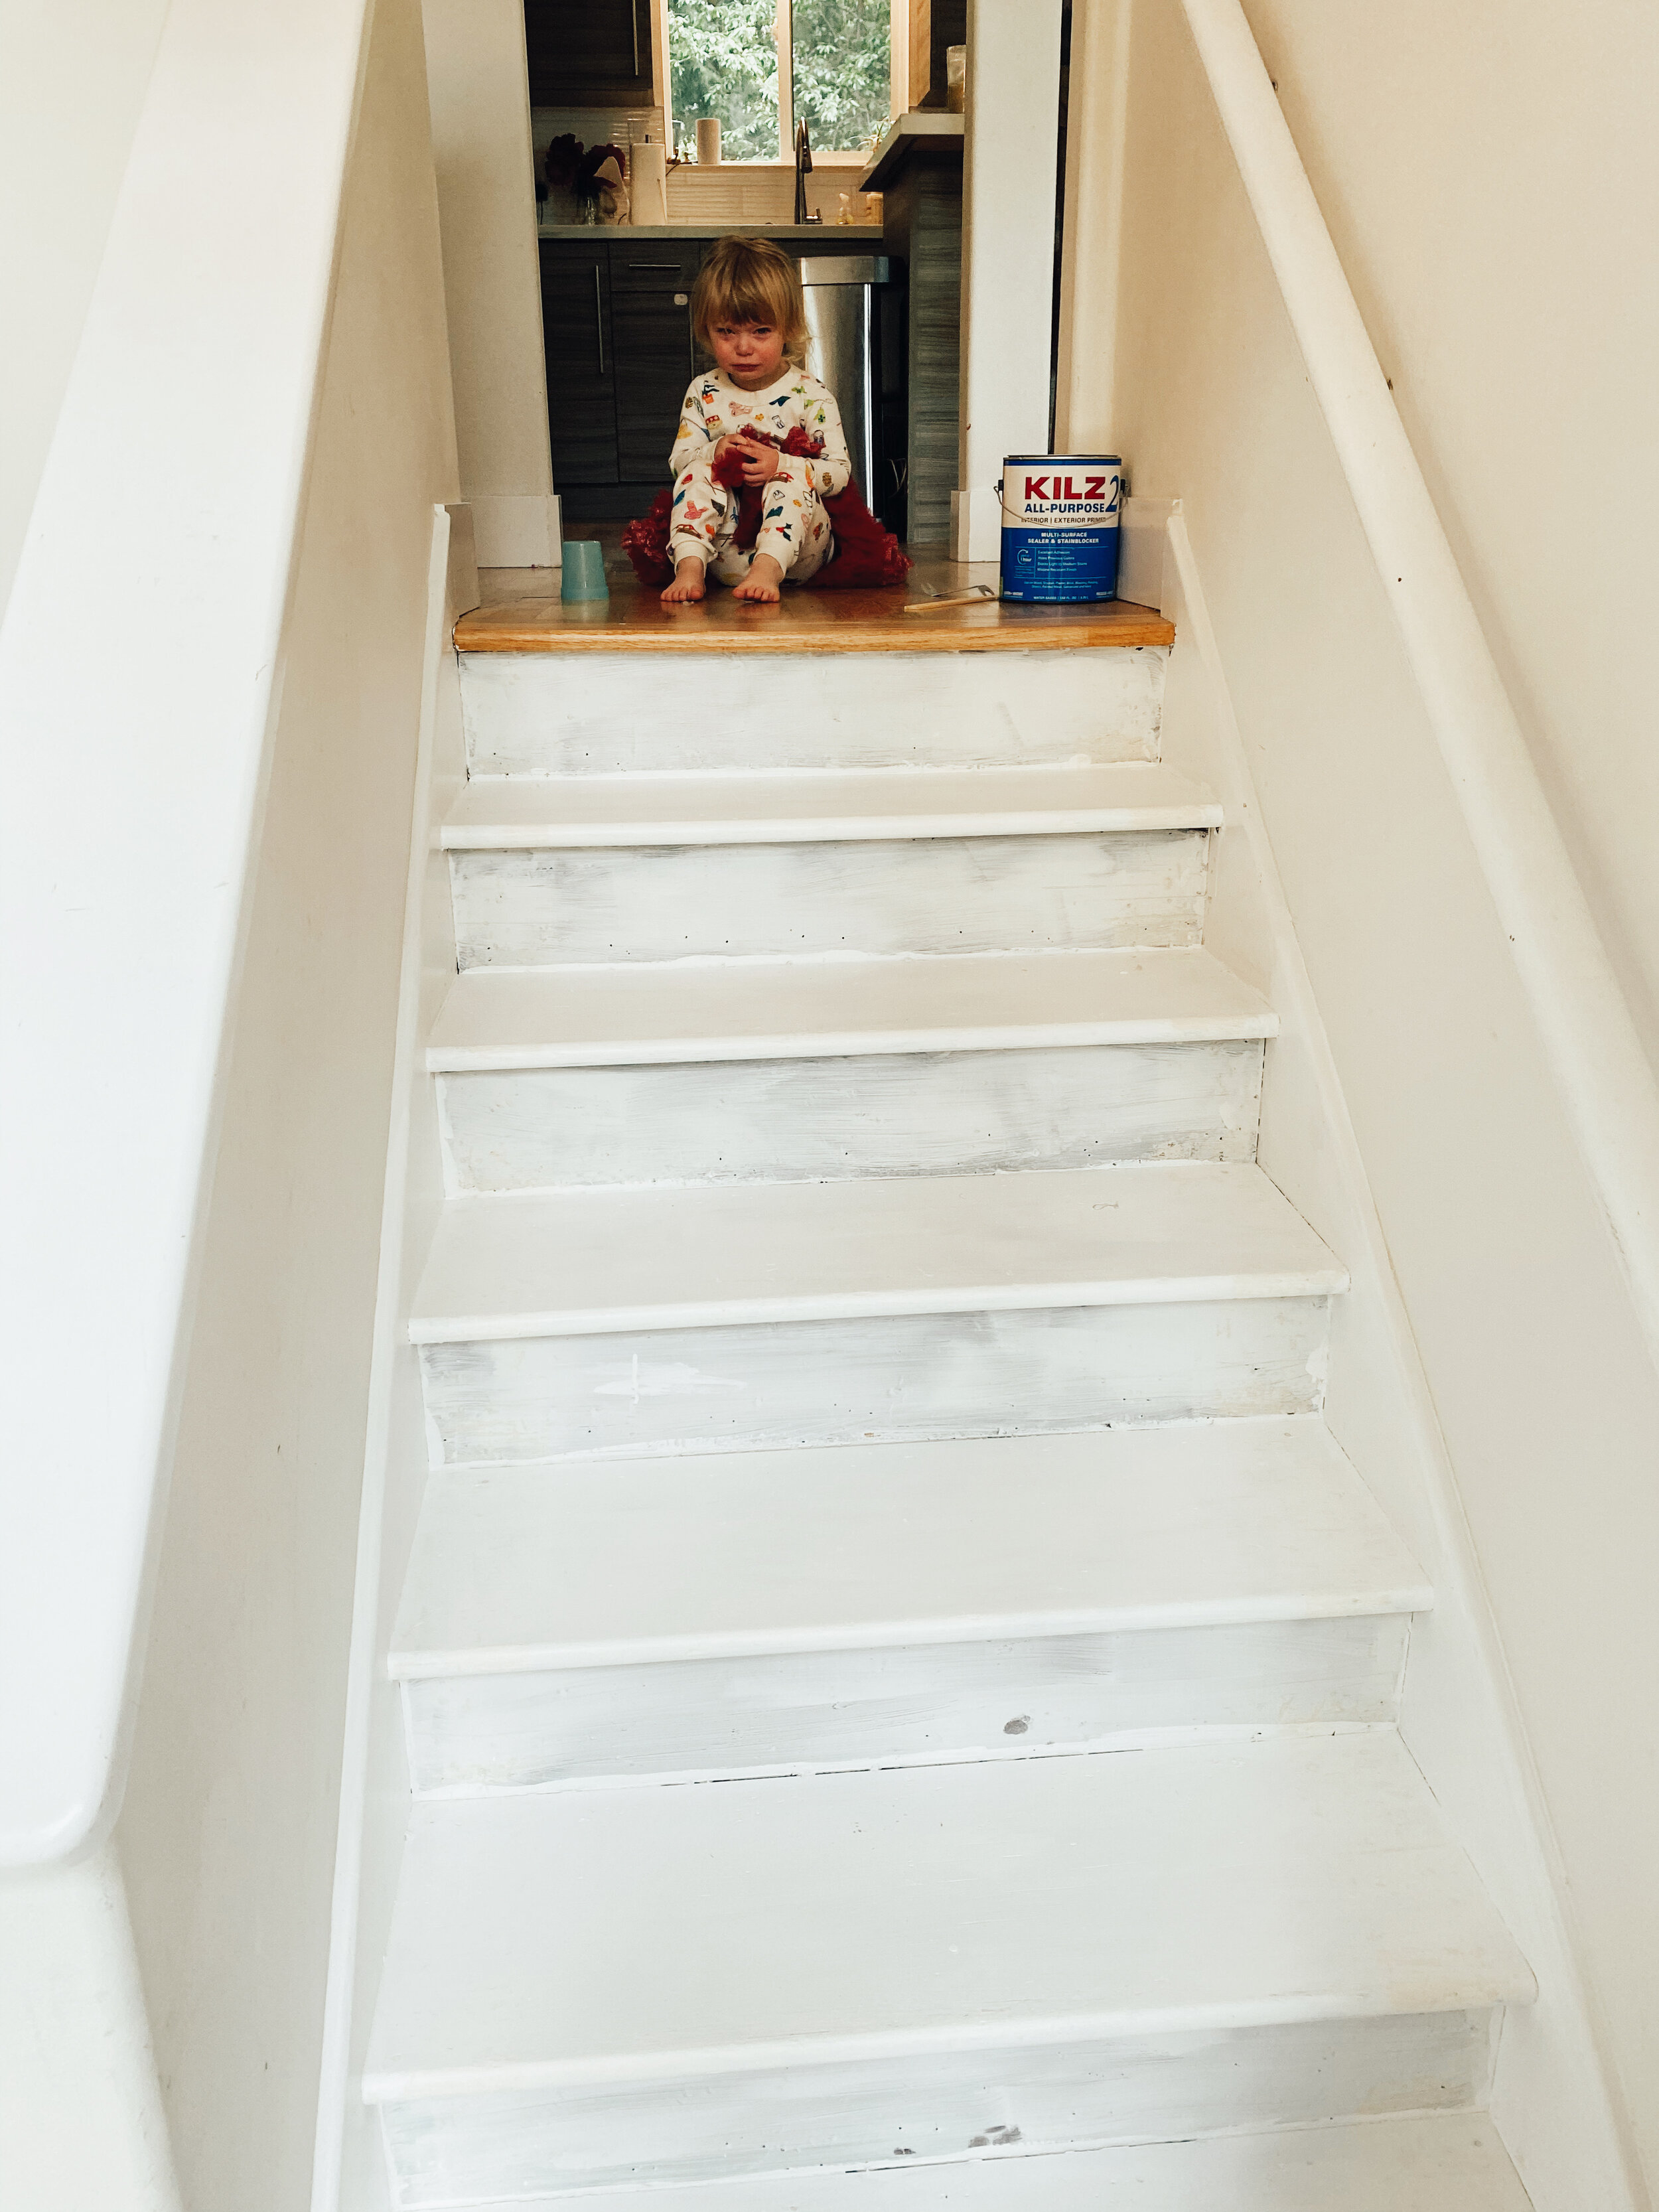
We did the final coat of white on the tops last, so we could cover up any color that got out of line. I could probably have done one more coat of white (the stairs were pretty dark and some of the wood color kind of seeps through in the light), but since this is a pretty temporary project, I didn’t want to spend more time.
Once dry, we did a quick caulk around any areas that needed it, and voila, all done!
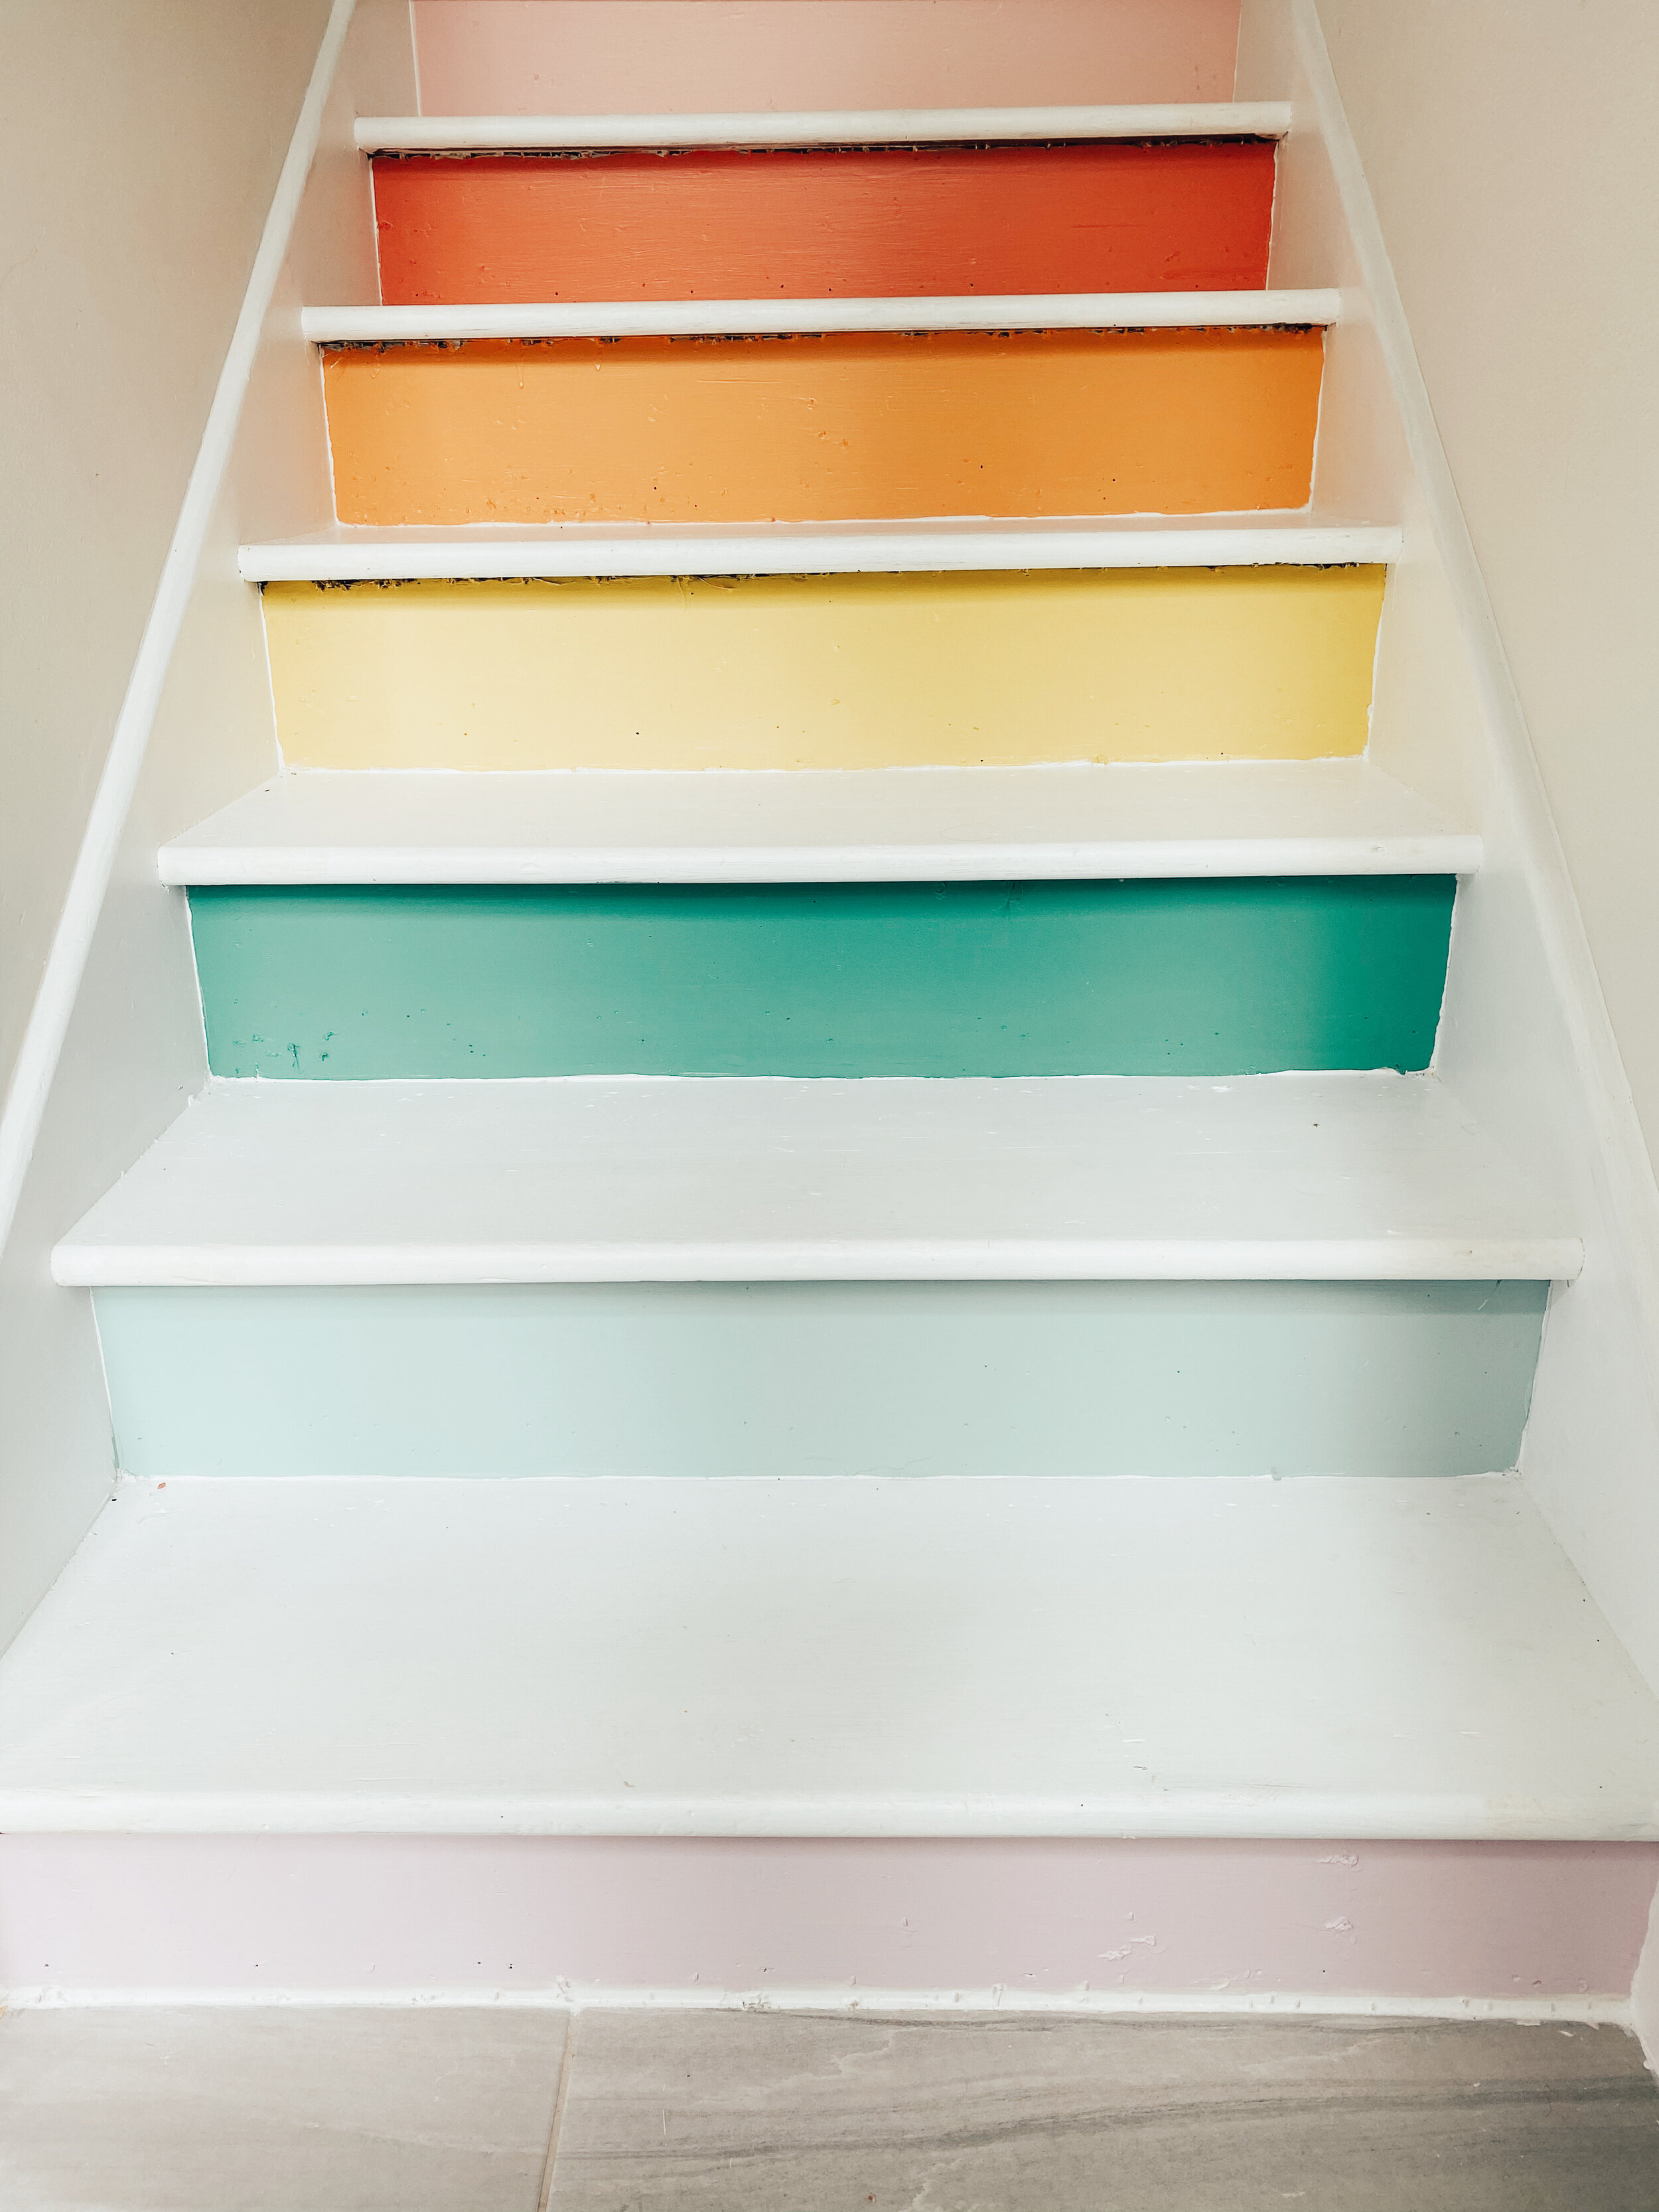
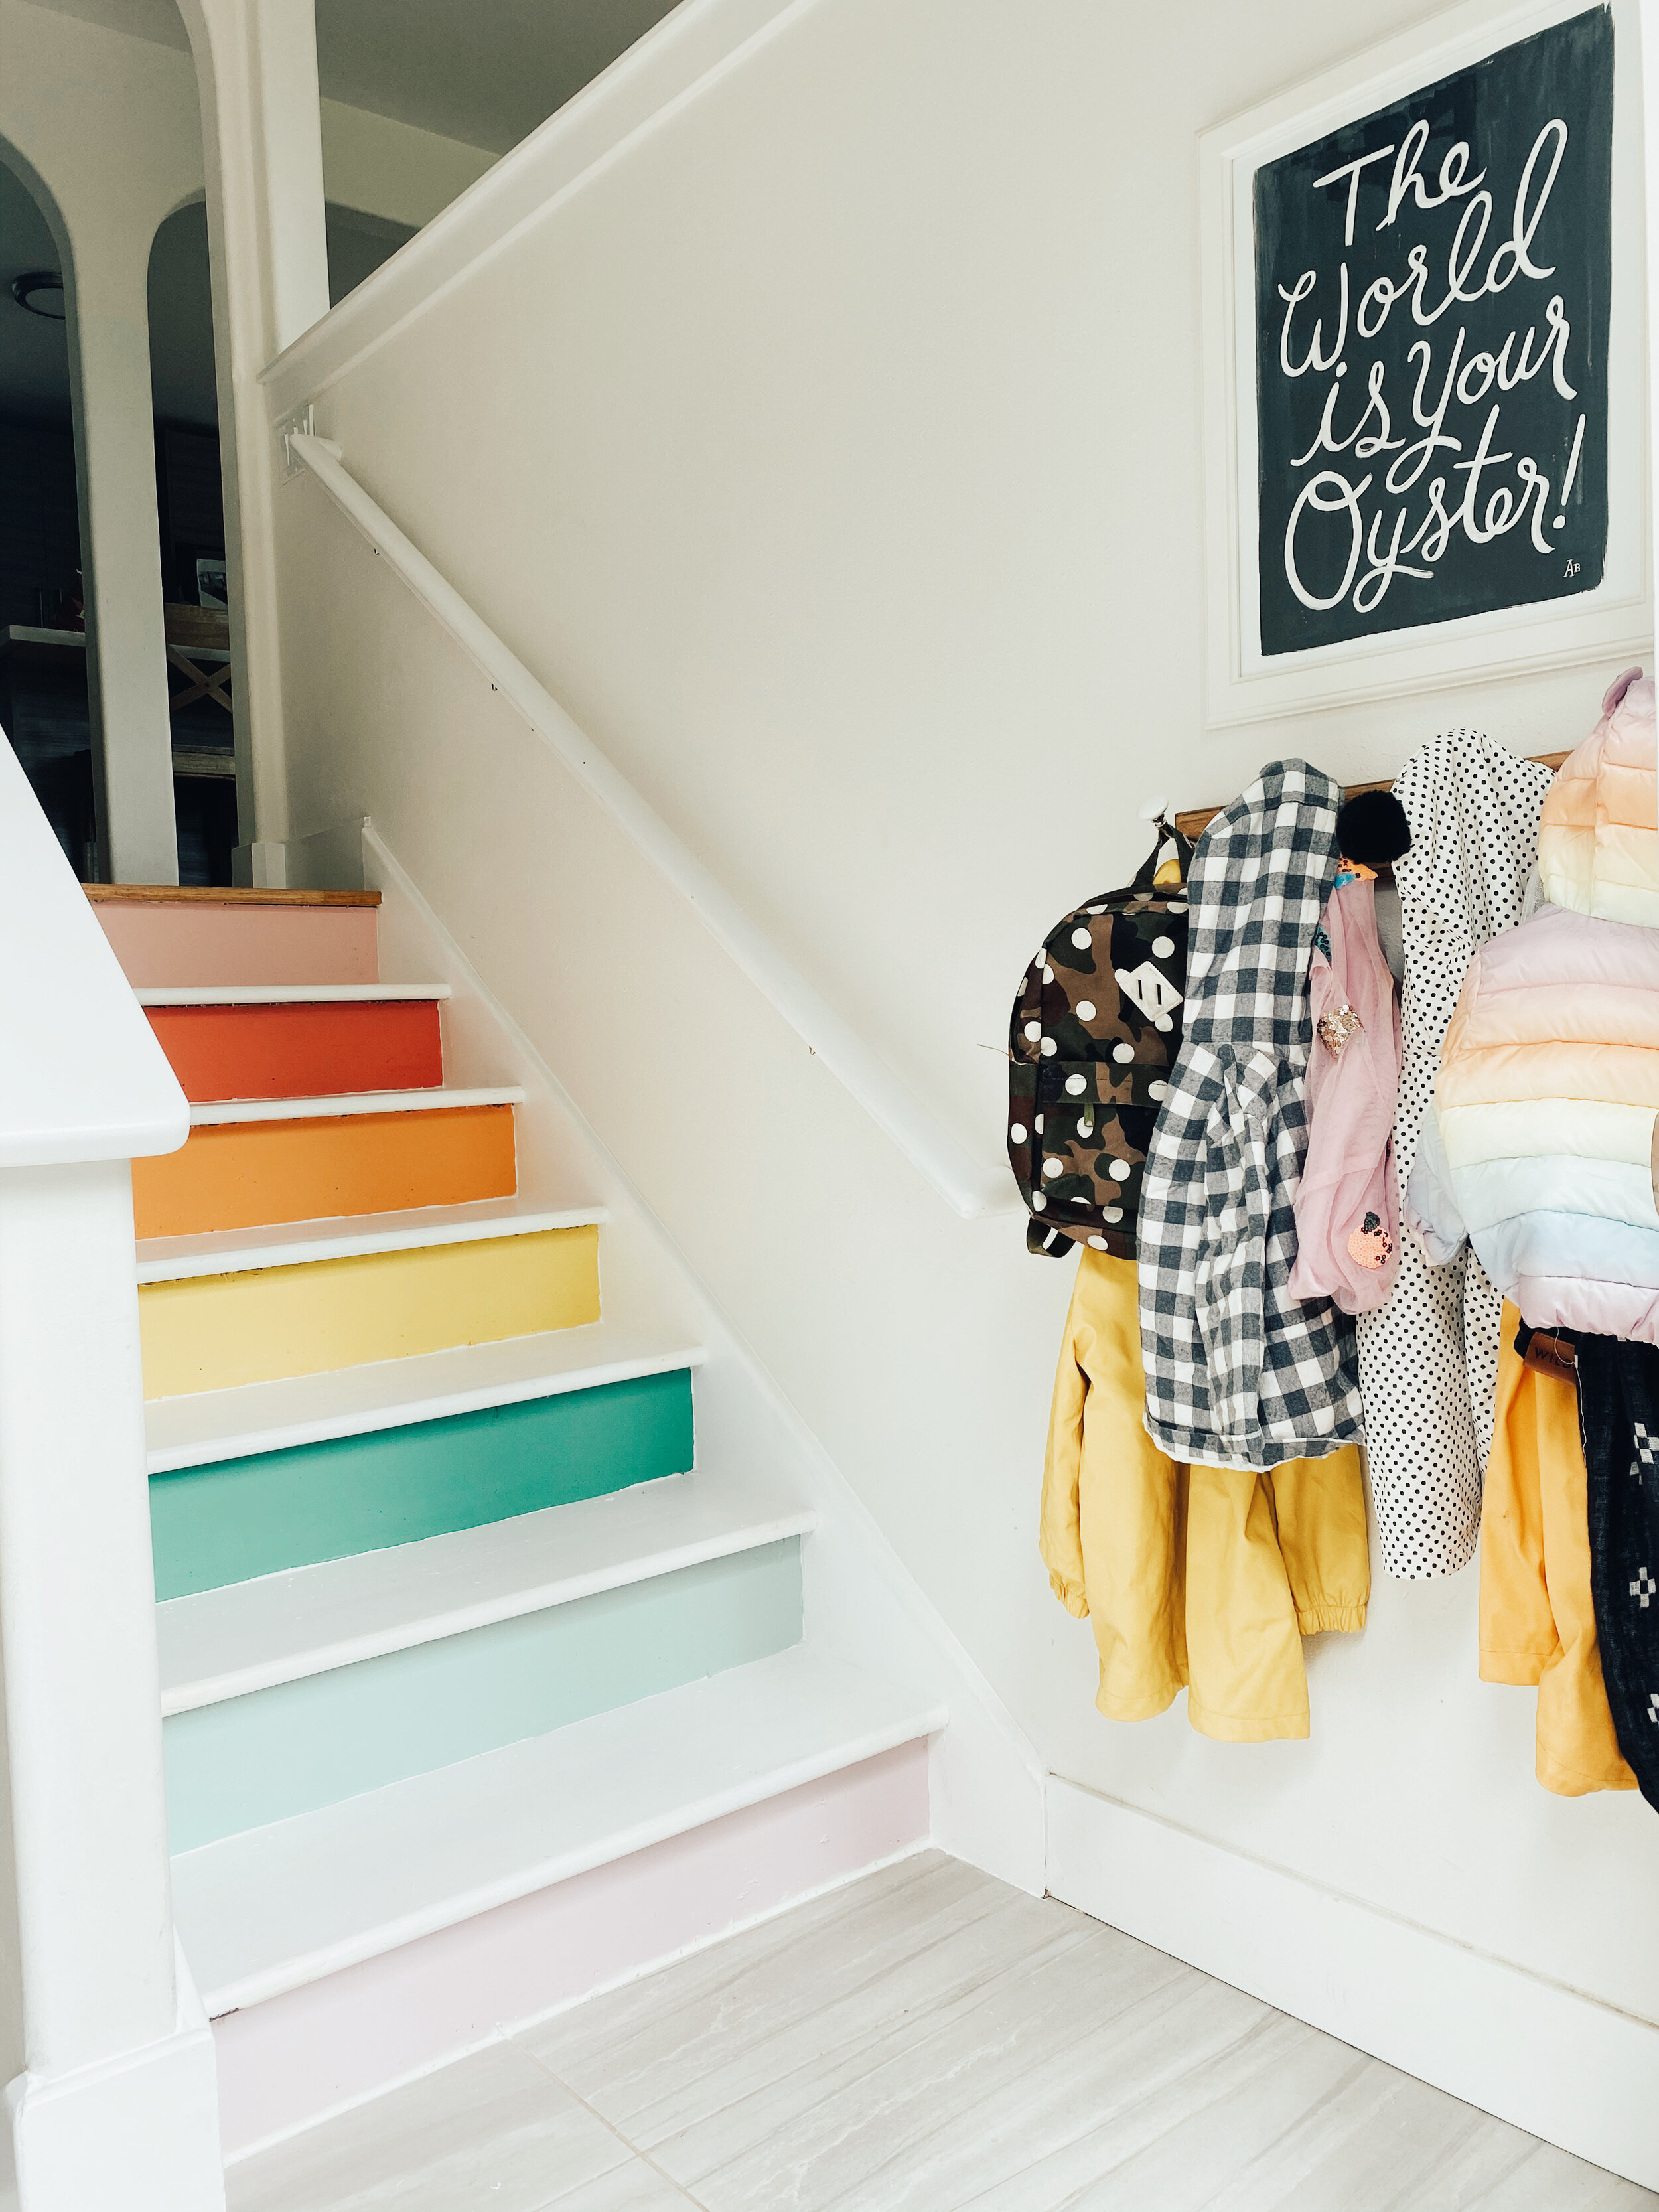
What do you guys think?! They make the PERFECT photo backdrop and honestly make me smile every time I see them. A MAJOR upgrade if you ask me!


